Office 2016: Microsoft Word
We’ve all used the Microsoft Office suite before. We use it at work, in school, at home, to record the information we need. We write papers, create spreadsheets, and design presentations all using Office. Even though we use it frequently, do we know all it can do? What makes it stand out from all the other software?
For the next few weeks I’m going to talk about Microsoft Office and some of the many new features that have been added with the release of the 2016 version. Additionally, I’ll also show you some features that have been there for a while that you may not know about. Obviously with so many features, I won’t be able to cover them all but tweet me any questions you want me to answer about Office and I’ll do my best to respond.
Microsoft Word
Part one will be all about Microsoft Word 2016 -the client application that is installed on your PC or MAC. You can find the Microsoft Word App on your ipad, iphone, Windows Phone, Adroid tablet, but the App version just does not have all of the features of the desktop version. Of all the Office products this this application is probably used the most but is still underutilized.
Navigation Bar

First let’s go over the navigation bar. This isn’t a new feature; the tabs were brought in with the release of Office 2010. Clicking the tab will open different functions for you to use when creating a Word document. To show more options of a section in the tab, click the small arrow in the bottom right.
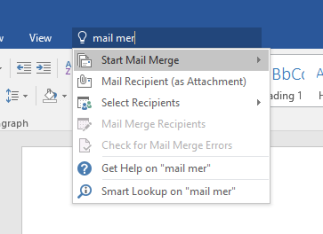 Even though the tab feature isn’t new, sometimes remembering which tab a certain function is in can be difficult. Microsoft decided to help us with that by created the “light bulb”. This allows you to type in the feature and it will find it for you. For example, if I can’t find the tab with mail merge in it (it’s in Mailings), I can just start typing “mail merge” and it will find it for me as well as give me other options.
Another tip about the navigation bar: click the pin on the far right side when you have one of the tabs open, this will allow you to view the expanded view at all times.
Formatting
There are so many options for formatting your document using Microsoft Word. Most of the formatting functions are in the “Home” and “Layout” tabs. In the home tab you can change the font, text color and size, underline, and more. One of my favorite tools is “Clear all formatting”,  depicted as an eraser erasing text.This tool allows you to restore the text to the original formatting. So when you copy and paste text from another document or website that is in a different size, color, or font, just highlight the text, click this tool, and the text will be the same as your original format.
Another place to use the formatting functions is by highlighting a section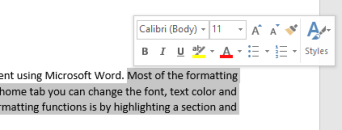 and a pop-up menu will appear. This menu gives some quick tools, that are all on the “Home” tab, that are great to reformate your text. One tool that is there is the Format Painter. This is a great tool to copy a format that you have already created. For example, there is text that is underlined, bolded, and in a different font. You want to copy this style but instead of having to apply all though changes to the new text individually all you have to do is highlight the text you want to copy, click the paint brush, and the highlight the new text you want to change. The new text will now be in the format you had previously used.
For any additional formatting go to the layout tab where you can find: margins, page orientation, page size, columns, page breaks, and more.
Citations
One function that I use all the time are the style options that are displayed in the navigation bar. It’s great to get that header looking just how I like it. In addition to the format of the text it also makes it simple to create a table of contents page. Once I’ve used the style options all I have to do is go to the “References” tab and click “Table of Contents”. One will automatically generate.
The “References” tab is great for students, researchers, lawyers…etc. This tab helps with your bibliography (or work cited) pages, your footnotes, any images you might need to label. It will also keep track of sources you’ve already used. This is a great resource when writing long documents.
Review
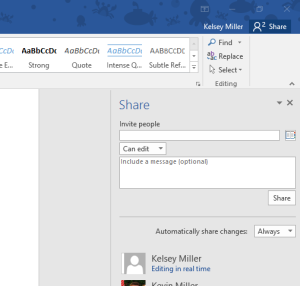
Once you have finished writing your document with all your citations and formatting, it is always good to have someone else review it. Word has the “Review” tab so that reviewing a document is easy. This is also helpful when you have multiple people editing the same document. It will mark any changes that were made without losing the original text. There is the option to accept or reject any changes that have been made or you can revert back to an older version without any of the changes. There is also the “Restrict Editing” option. This allows you to protect any part of your document from other’s changes.
Mail Merge
I love the mail Merge feature. Mail merges just make sending documents, emails, address labels that are personalized in mass quantities easy. I always think about the time that I’m saving by using this feature. Even though it is a great feature, a lot of people have never used it.
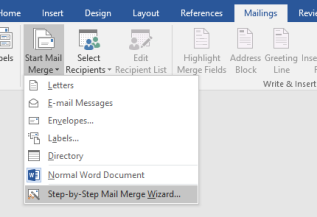 The easiest way to start a mail merge is by going through the “step-by-step mail merge wizard”. This wizard will guide you through the processes…step-by-step. The first this that you will have to choose is what you are creating; letters, emails, envelopes, labels, or a directory. The next step is asking what document you want to use for this merge. Most of the time I use the document that I have already been working. Step 3, you choose from a list you have. You can choose from an existing list from an excel file, your outlook contacts, or you can create a new list. The next step is to insert the merge fields. You can insert the field directly from the wizard or from the navigation bar. There are different fields based on the list you are using. The final step of the merge is to print your document. When you click “print” it will run through the merge and show you what each individual letter, label, or envelope will look like. You can edit or go right to the print page.
Click for more details on Mail Merges

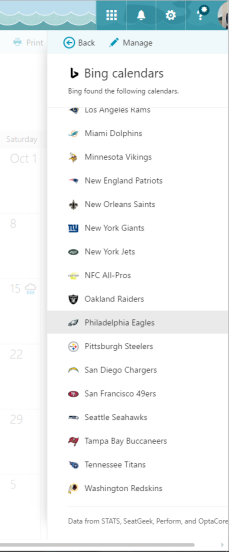 using the new Surface Pro 4. From looking up plays to making timely choices on your fancy team Microsoft has enhanced the NFL experience across the board.
 One other improvement that Microsoft seems to have snuck in for OneDrive and SharePoint capacities is the file size limit has been increased from 2 GB to 10 GB. Whoa! I think it’s time you called your ISP for an increase in bandwidth.


 generated every step of the way in electronic medical records, communications, and clinical images. With the rapid growth of healthcare data, there is greater pressure than ever on health organizations’ budgets. Azure can help reduce concerns.

 create a presentation about anything and see how long it takes you. When I first wanted to try Sway I created one about Moose which took me 10 minutes start to finish. It obviously wasn’t perfect considering I took everything from sites I found online, but it was a great rough draft.
 Windows Edge
 years ago and some of the technology does not sync seamlessly with Windows 10. The microphone in my laptop apparently does sync with Cortana as well as other microphones. The good thing however, is that Cortana is working on recognizing my voice even though it is more difficult with my microphone. At this point the “Hey Cortana” feature does not work but hopefully with more use and tuning of my microphone, the “hands-free” feature of Cortana will eventually work. I like the new start button that allows me to see my most used apps and most recent documents. I’m still getting used to it but it is definitely an easier and more convenient operating system.